Parts Accounting Source Setup
An Accounting Source for Parts will determine the Revenue and COGS mapping for the sale of assigned parts. The source allows the dealer to determine which account will be used according to Document Type and Customer Type. You may create as many different Accounting Sources as needed to map parts to each Parts Revenue Account you track.
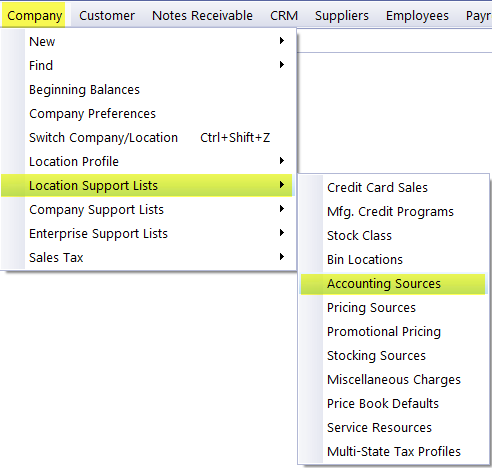
To create or edit a Parts Accounting Source, Navigate to:
Company > Location Support Lists > Accounting Sources
This will open the list of existing Accounting Sources. You can double-click on an existing source to edit or you can click on Add New to create a new accounting source.

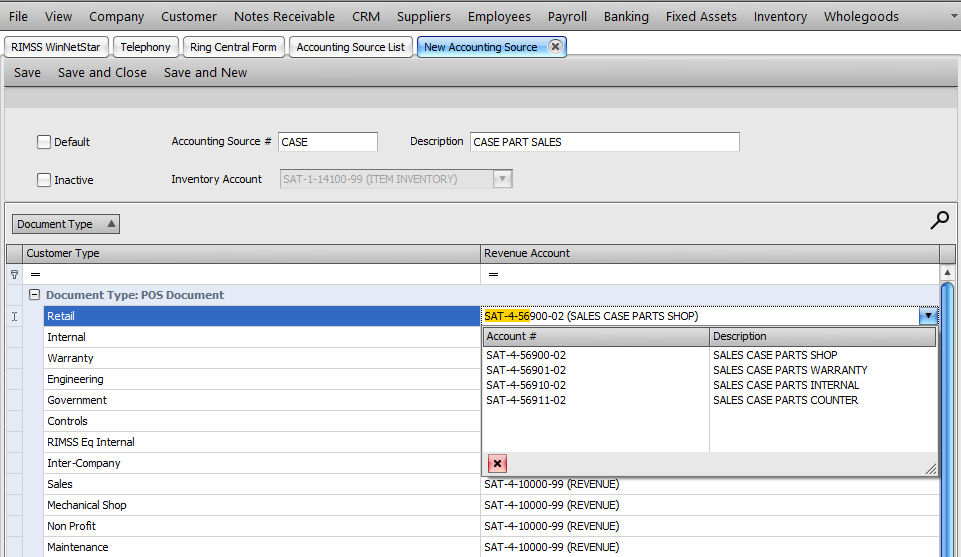
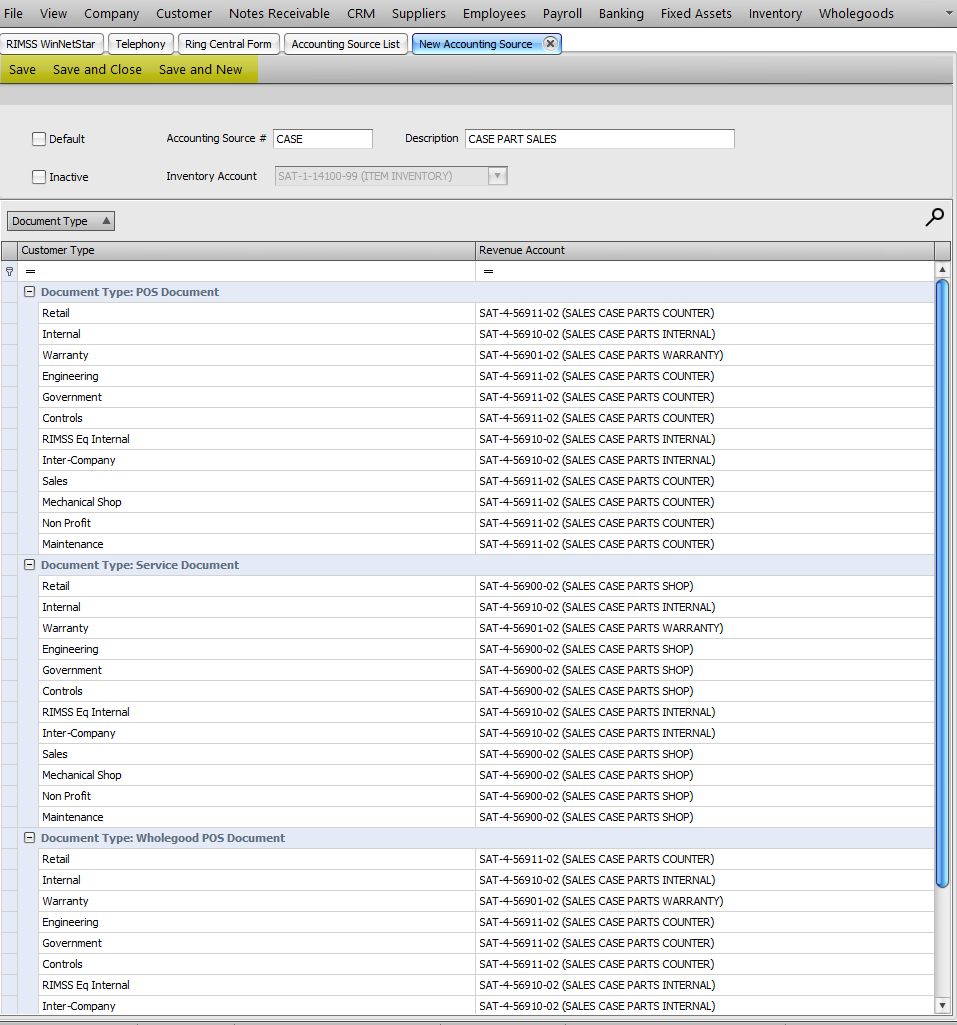
Below is an example of the New Accounting Source tab that will open when you click on Add New. The system REVENUE account will default to all mapping lines and will remain until you select a different account.

You will be required to add the Accounting Source # and Description before saving the new source. Both fields are Alpha-Numeric, meaning you can enter numbers and/or letters for each field.
I will create an Accounting Source for Case parts. I separate my revenue between the Parts and Shop Counters and I track parts used for Warranty and Internal separately. I created the following G/L accounts for each of my categories.
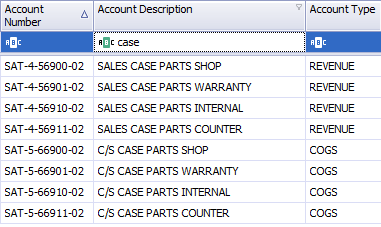
I am now ready to assign these accounts to my accounting Source. I will assign accounts according to the following Logic. The system will automatically bring in the Associated COGS account with the Revenue account assignment.
SALES CASE PARTS SHOP:
- Will be assigned on the document types POS Document and Wholegood POS Document.
- Will apply to all customer types that are not specific to Warranty or Internal sales
SALES CASE PARTS WARRANTY:
- Will be assigned on all document types.
- Will apply to all Warranty customer types.
SALES CASE PARTS INTERNAL:
- Will be assigned on all document types.
- Will apply to all Internal customer types.
SALES CASE PARTS SHOP:
- Will be assigned on the document type Service Document.
- Will apply to all customer types that are not specific to Warranty or Internal sales.
In this example, I am not breaking out Government, Non Profit, Wholesale, or other types of sales in the General Ledger, but I do have the ability to create that type of detail in my mapping if desired.
To map each account, I will click the dropdown on the row. I can scroll to find the account or type in the account number to filter the list to the correct account.
Once you have mapped the G/L accounts to each document and customer type, click on Save, Save and Close, or Save and New to save the new Accounting Source in the system.
To assign the new Accounting Source to a group of parts, navigate to:
Inventory>Utilities>Mass Updates

Enter your Pre-Fetch and Post-Fetch filters to create a list of parts that will be assigned the new Accounting Source. In my example, I filtered to all parts within the CAS Price Book. Once the list is populated, click Select All at the top to select the parts for update.
You can uncheck or check specific parts in the list as needed.
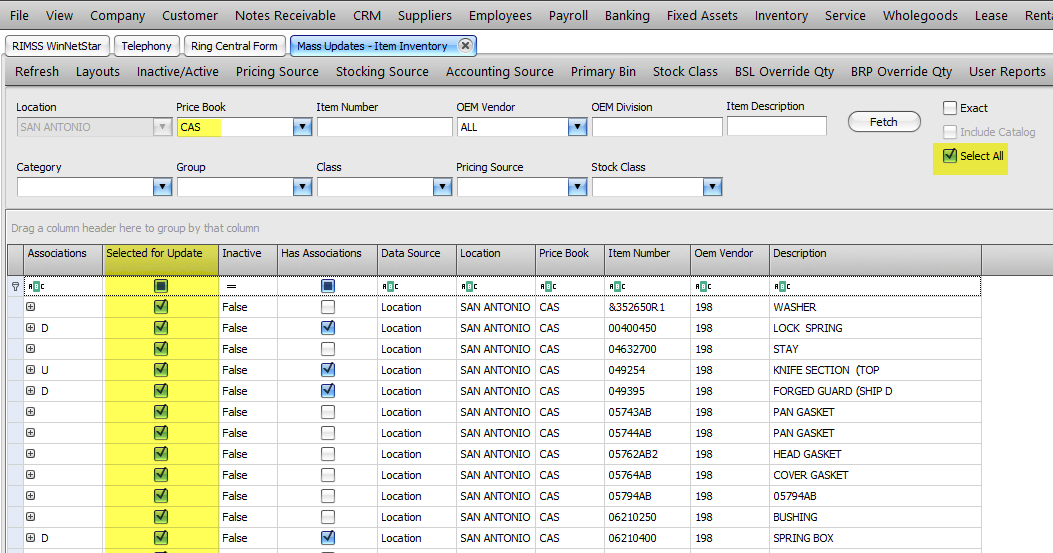
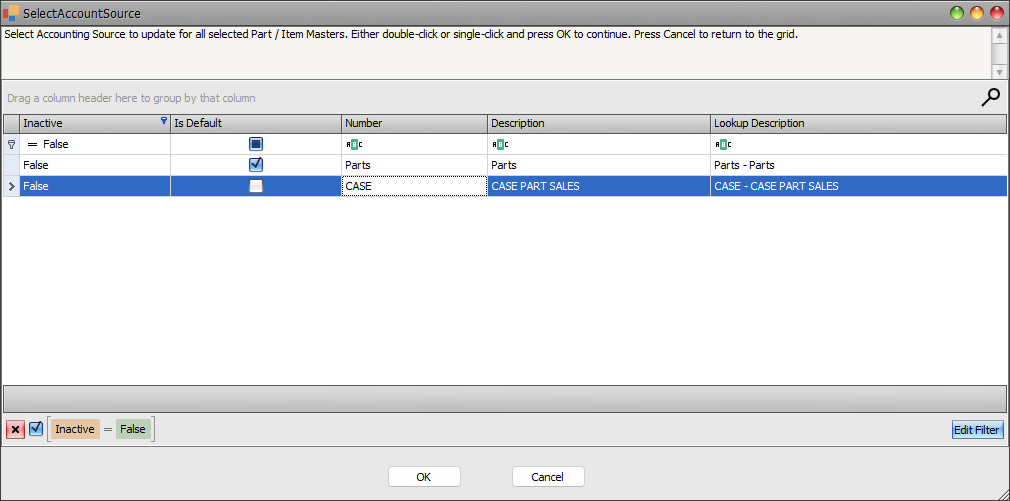
Click on Accounting Source in the menu bar at the top of the grid to get the pop-up to choose the correct source to be assigned to the selected parts.

Double Click on the Source to be assigned.
Click OK on the popup that verifies the number of parts you will be updating if you want to proceed with the update. Click Cancel to abort the update.
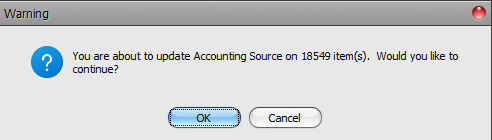
Depending on the number of parts you are updating, the system may take a few seconds to a few minutes to write the changes to the part records. RIMSS will confirm the update is complete with a pop-up showing the number of part records updated. Click OK to exit the pop-up.
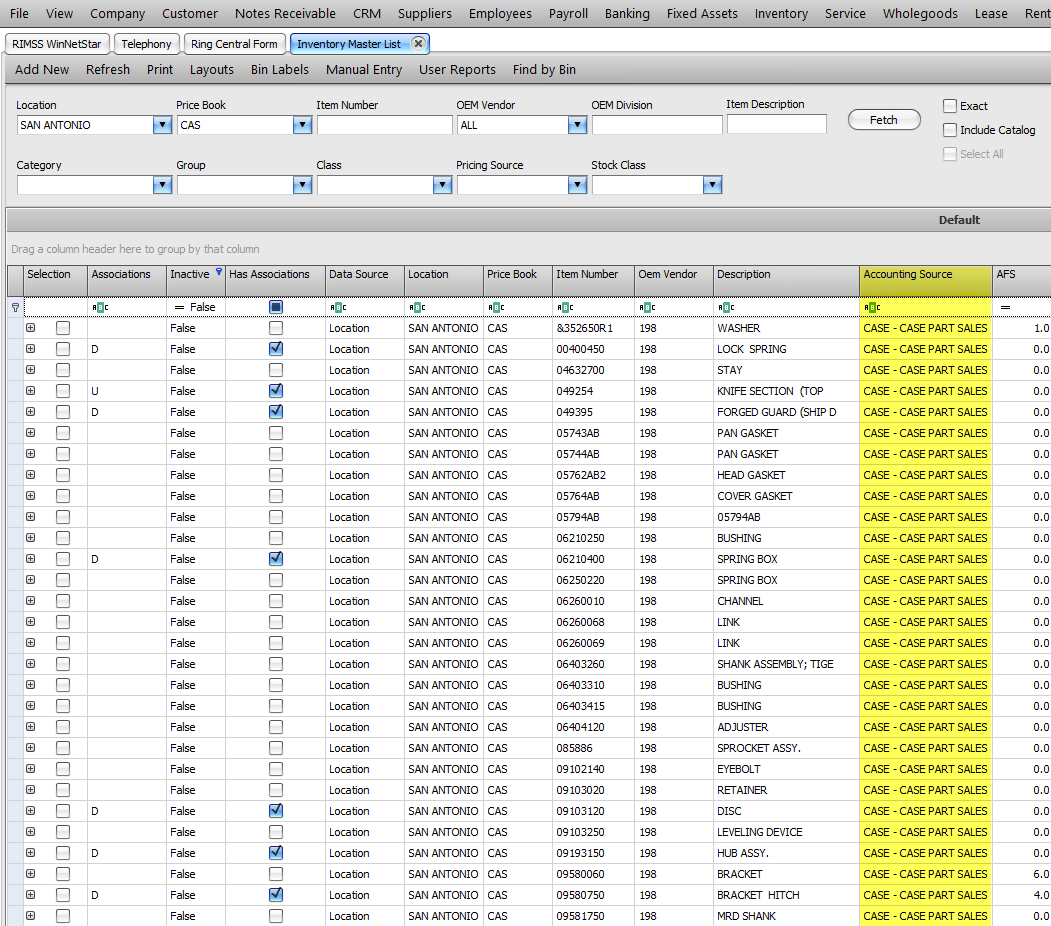
You can verify the updates by adding the Accounting Source column to the Inventory Master List and fetching the parts that were included in the Mass Updates list.