Paying Floor Plan Amounts with Wholegood Floor Plan Scheduled Payments
Using the feature for Wholegood Floor Plan Scheduled Payments, you can select specific floor plan amounts or specific floor plan scheduled payments and have the system create the payment documents.
Before you can pay floor plan amounts with this feature, you will need to configure RIMSS. Click here for the instructions on configuration.
To pay a floor plan, navigate to Wholegood > Find > Floor Plan Scheduled Payments

The Floor Plan Scheduled Payments Tab will open blank. You can enter a pre-fetch filter or just fetch the entire list.
Wholegood ID, Serial #, and Stock # fields allow you to search for a specific wholegood to pay.
Liability Account allows you to choose a specific floorplan account and the list will be limited to wholegoods for which that Liability Account is assigned.


Pairing the Liability Account Pre-Fetch filter with a Wholegood Status Find Panel filter can narrow the list for finding specific units to be paid.
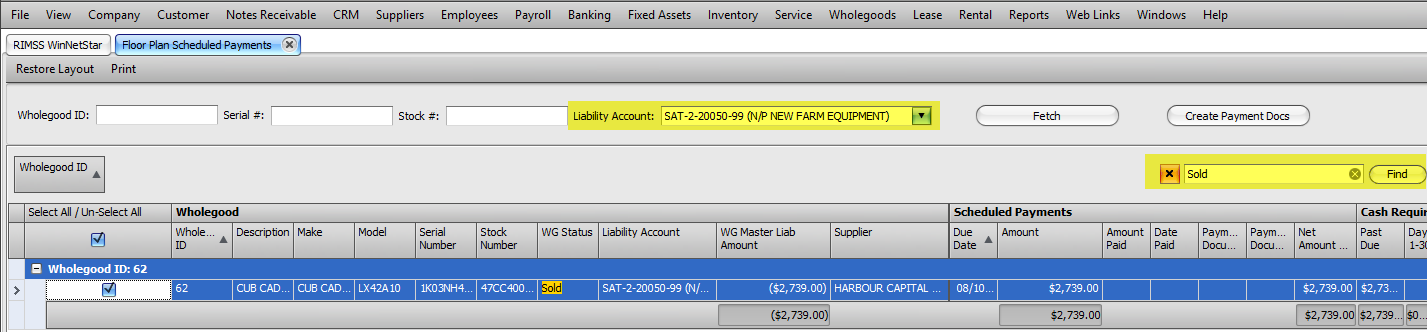
Once you have the amounts selected for payment, click on the Create Payment Docs button at the top of the tab.

You will see a Payment Documents pop-up. This pop-up will apply the input information to all payment documents created for all Suppliers included on checked lines.
If you are paying multiple units to a single Supplier, they will be included on one payment. If you need a separate payment for each unit, you will need to select the amounts one at a time and create each payment individually.
There will be a separate payment created for each Supplier selected.

Payment Type: Manual Check, Cash/ACH
Number / Ref.: Check Number or Reference Number for the payment(s)
Date: Date the payments will post to the Bank Account
Pmt Acct: Bank Account to post the payment(s)
Memo: Add specific information you would like captured for reconciliation or review. The auto-populated memo may be deleted.
Once payments have been created, you will receive a confirmation message.

You can find the created payments under Banking > Find > Payment

The date range must include the payment date you chose in the step above. You can double click on any of the payments to open the document. These payments follow the normal rules of voiding.

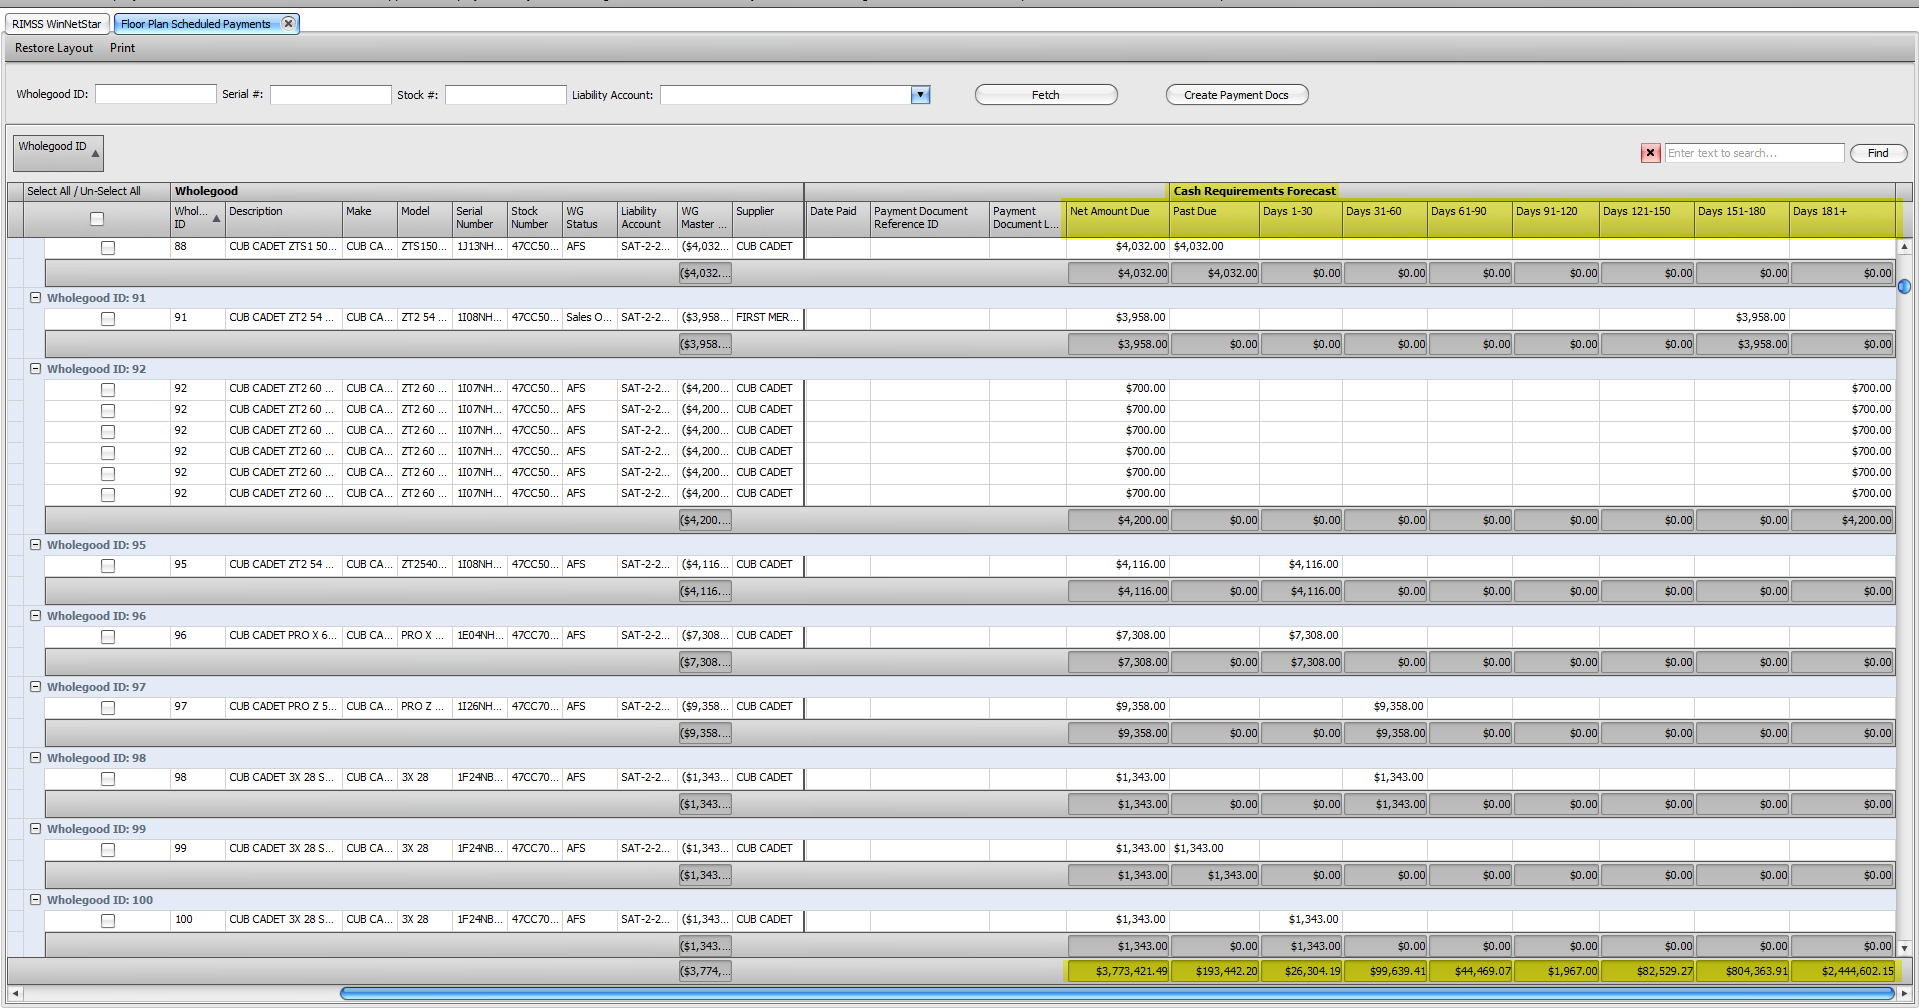
There is a Cash Flow Requirements Forecast Report built into the Wholegood Floor Plan Scheduled Payments grid. Scroll to the right side of the grid to see the cash requirements forecast. The totals are shown at the bottom of the screen. You will want to fetch the list with no filters to see the full forecast.